appleton farms boneless ham cooking instructions
Appleton Farms Boneless Ham Cooking Instructions: A Comprehensive Guide
Preparing a delicious Appleton Farms boneless ham requires understanding cooking times‚ glaze application‚ and proper reheating techniques for a perfect holiday or family meal․
Understanding Your Appleton Farms Boneless Ham
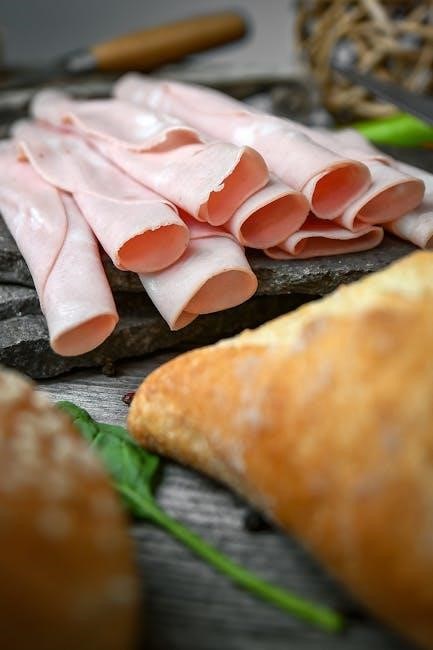
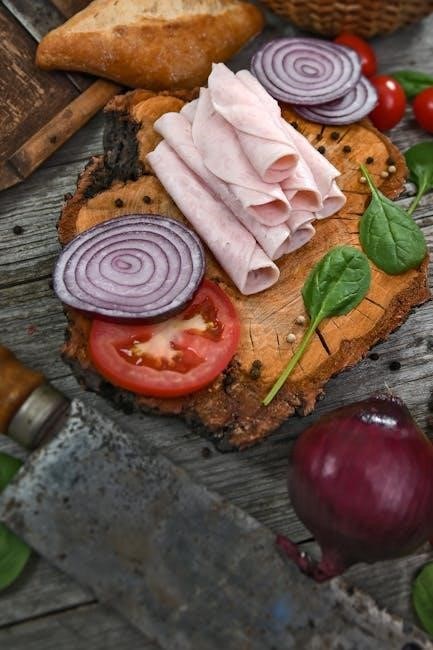
Appleton Farms boneless hams are a popular choice for holidays and gatherings‚ offering convenience and delicious flavor․ Before you begin‚ it’s crucial to understand the characteristics of your specific ham․ These hams are typically pre-cooked‚ meaning they’ve already been fully cooked and are safe to eat without further cooking – however‚ reheating is essential for optimal enjoyment․
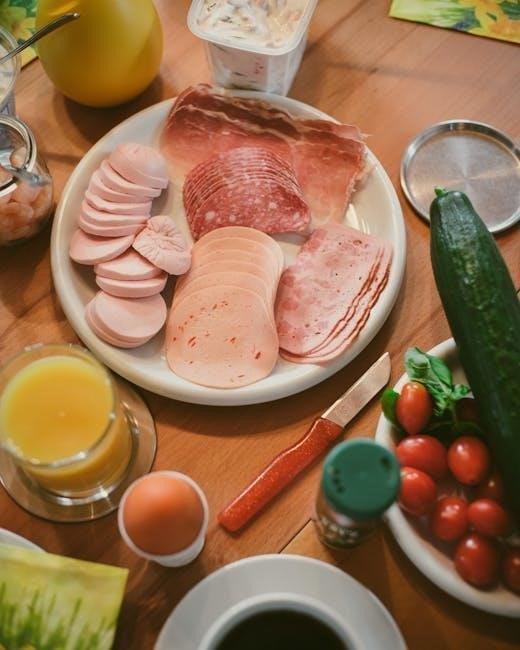
The boneless nature simplifies carving and serving‚ making it ideal for larger groups․ Understanding whether your ham is fully cooked or requires more extensive cooking is paramount․ Grocery store pricing can vary‚ with some hams selling for as low as 85 cents per pound‚ especially around peak seasons like Easter․ Knowing this foundational information will guide your cooking process and ensure a perfectly prepared ham․
Types of Appleton Farms Boneless Hams Available
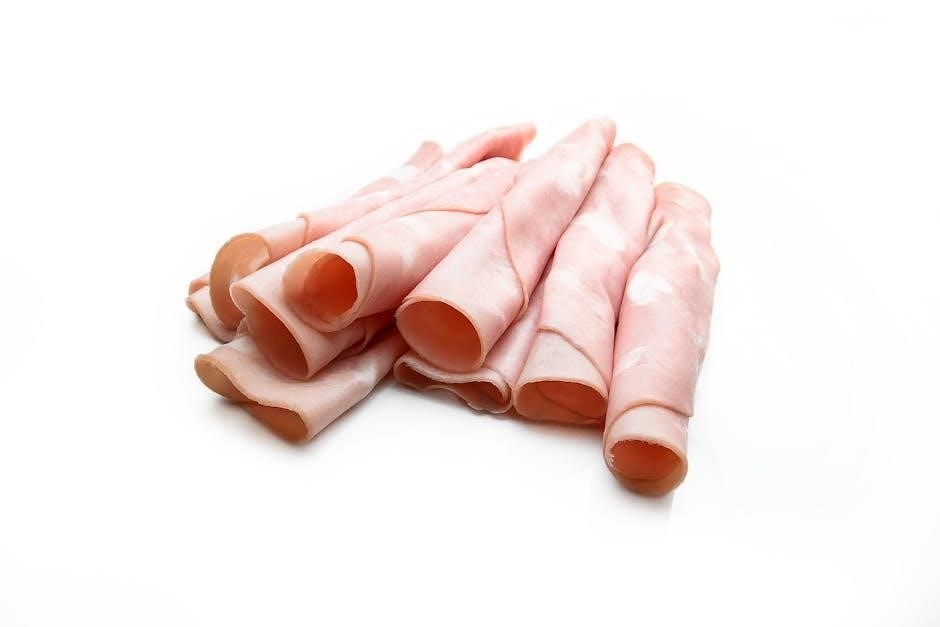
Appleton Farms offers a variety of boneless ham options to suit different preferences and meal sizes․ While specific product lines may change‚ you can generally find fully cooked‚ spiral-sliced boneless hams‚ which are incredibly convenient for serving․ These spiral-sliced hams are pre-cooked and require only reheating‚ making them a popular choice for busy cooks․
Additionally‚ Appleton Farms may offer boneless hams with different glaze options already applied‚ such as brown sugar or maple flavors‚ adding an extra layer of taste․ The availability of these options can fluctuate depending on the season and retailer․ It’s important to check the packaging to determine the specific type of ham you’ve purchased‚ as this will influence the recommended cooking or reheating instructions․ Understanding these variations ensures you select the best ham for your needs․
Determining if Your Ham is Pre-Cooked
A crucial first step before cooking your Appleton Farms boneless ham is confirming whether it’s pre-cooked․ Most hams sold in grocery stores‚ especially around holidays like Easter‚ are fully cooked․ However‚ it’s vital to verify this to avoid overcooking and drying out the ham․
The packaging will clearly state “Fully Cooked‚” “Pre-Cooked‚” or “Ready to Eat․” If you don’t see any of these phrases‚ assume the ham requires thorough cooking to a safe internal temperature․ Pre-cooked hams only need to be reheated to a minimum internal temperature of 140°F (60°C)․
If the ham is labeled as “Cook Before Eating‚” it needs to reach an internal temperature of 165°F (74°C) to ensure it’s safe for consumption․ Always prioritize checking the packaging for this essential information before beginning the cooking process․
Reading the Appleton Farms Ham Packaging
The Appleton Farms boneless ham packaging contains vital information for successful cooking․ Beyond confirming if it’s pre-cooked‚ carefully examine the label for weight‚ which impacts cooking time․ Look for any specific cooking instructions provided by Appleton Farms‚ as these override general guidelines․
Pay attention to any included glaze packets or suggested glaze recipes․ The packaging may also indicate if the ham is spiral-sliced‚ influencing glaze penetration․ Note the “sell-by” or “use-by” date to ensure freshness․
Crucially‚ the label will list the net weight‚ essential for calculating accurate cooking times per pound․ Some packages detail suggested oven temperatures․ Always retain the packaging during preparation for quick reference to these important details‚ ensuring a safe and flavorful result․
Preparing the Ham for Cooking
Proper preparation involves rinsing‚ optional scoring for glaze absorption‚ and crucially‚ applying a glaze to enhance flavor and create a beautiful‚ caramelized exterior․
Rinsing and Patting Dry
Before you begin any cooking process with your Appleton Farms boneless ham‚ a simple yet crucial step is rinsing it thoroughly under cool water․ This removes any surface impurities or packaging residue that may have accumulated during processing and storage․ Don’t skip this step – it contributes to a cleaner flavor profile․
Following the rinse‚ it’s equally important to pat the ham completely dry with paper towels․ Excess moisture can hinder the development of a beautiful‚ flavorful glaze and can also affect the overall cooking time․ A dry surface allows the glaze to adhere properly‚ creating that desirable caramelized crust․ Ensure all crevices and folds are thoroughly dried for optimal results․ This foundational step sets the stage for a perfectly cooked and presented ham․
Scoring the Ham (Optional)
While not strictly necessary‚ scoring the surface of your Appleton Farms boneless ham is an optional technique that can enhance both its appearance and the glaze’s penetration․ Using a sharp knife‚ gently create a diamond pattern across the ham’s surface‚ cutting about ¼ inch deep․ Be careful not to cut too deeply‚ as you don’t want to separate the meat․
This scoring process provides more surface area for the glaze to cling to‚ resulting in a more evenly coated and flavorful ham․ The diamond pattern also allows the glaze to seep slightly into the meat‚ adding moisture and intensifying the taste․ Visually‚ scoring creates an attractive presentation․ If you choose not to score‚ your ham will still cook beautifully; it’s purely a matter of preference for aesthetics and glaze adherence․
Applying a Glaze – Importance & Benefits
Glazing your Appleton Farms boneless ham is crucial for achieving a beautifully finished product with enhanced flavor and moisture․ A glaze isn’t just for aesthetics; it creates a delicious‚ caramelized crust during baking․ The sugars in the glaze react with the ham’s proteins‚ resulting in a rich‚ savory-sweet exterior․
Furthermore‚ a glaze helps to prevent the ham from drying out during the cooking process‚ locking in valuable juices․ Glazes can range from simple brown sugar and honey mixtures to more complex recipes incorporating fruit juices‚ spices‚ and mustards․ Choosing the right glaze complements the ham’s natural flavor‚ elevating the overall dining experience․ Don’t skip this step – it truly transforms a good ham into an exceptional one!
Popular Glaze Recipes for Appleton Farms Ham
When glazing your Appleton Farms boneless ham‚ several recipes consistently deliver exceptional results․ A classic Brown Sugar & Honey glaze‚ combining 1 cup packed brown sugar‚ ½ cup honey‚ and ¼ cup Dijon mustard‚ offers a balanced sweetness and tang․ For a fruity twist‚ try a Pineapple-Brown Sugar glaze using 1 cup pineapple juice‚ ¾ cup brown sugar‚ and a dash of ground cloves․
Another favorite is the Maple-Mustard glaze‚ blending ¾ cup maple syrup‚ ¼ cup Dijon mustard‚ and 2 tablespoons apple cider vinegar for a sophisticated flavor profile․ A Cherry-Bourbon glaze‚ with 1 cup cherry preserves and ¼ cup bourbon‚ adds a touch of elegance․ Remember to brush these glazes generously over the ham during the last 30-45 minutes of cooking for a beautiful‚ flavorful finish․
Cooking Methods & Times
Oven baking is the most common method for Appleton Farms boneless ham‚ requiring gentle reheating for pre-cooked varieties‚ with times varying by weight and temperature․
Oven Baking: The Most Common Method
Oven baking consistently delivers a moist and flavorful Appleton Farms boneless ham․ This method is favored for its simplicity and even heating․ Begin by preheating your oven to a suitable temperature – typically between 325°F and 350°F‚ depending on the ham’s size and whether it’s fully cooked․ Place the ham cut-side down in a roasting pan‚ adding about ½ inch of water or broth to the bottom․ This helps maintain moisture during cooking․
Cover the pan tightly with aluminum foil to prevent drying․ Baking times will vary significantly; a general guideline is 10-14 minutes per pound for a fully cooked ham․ However‚ always rely on a meat thermometer for accuracy‚ aiming for an internal temperature of 140°F․ Basting with glaze during the final stages enhances flavor and creates a beautiful finish․ Remember‚ oven baking provides a reliable and delicious way to prepare your Appleton Farms ham!
Oven Temperature Guidelines
When oven baking your Appleton Farms boneless ham‚ temperature control is crucial for achieving optimal results․ A lower temperature‚ around 325°F (163°C)‚ is generally recommended for slower‚ more even heating‚ minimizing the risk of drying out the ham․ However‚ a slightly higher temperature of 350°F (177°C) can be used to reduce cooking time‚ particularly for smaller hams․
If you plan to glaze the ham during the last portion of cooking‚ starting at the lower temperature is advisable․ This prevents the glaze from burning before the ham is fully heated through․ Regardless of the temperature chosen‚ consistent heat is key․ Avoid frequent oven door openings‚ as this can cause temperature fluctuations․ Always use a reliable oven thermometer to verify your oven’s accuracy‚ ensuring a perfectly cooked and flavorful Appleton Farms ham․
Calculating Cooking Time for Boneless Hams
Determining the correct cooking time for your Appleton Farms boneless ham hinges on whether it’s pre-cooked or requires full cooking․ Most Appleton Farms boneless hams are pre-cooked‚ meaning they only need reheating․ For these‚ estimate approximately 10-14 minutes per pound at 325°F (163°C)․ Smaller hams (under 5 pounds) may require slightly less time‚ while larger ones might need a bit more․
If your ham is not pre-cooked‚ the cooking time significantly increases to around 18-20 minutes per pound at the same temperature․ It’s vital to confirm the ham’s status before calculating․ Remember these are estimates; always rely on a meat thermometer to ensure the internal temperature reaches a safe 140°F (60°C) for pre-cooked hams․ Accurate timing guarantees a moist‚ flavorful‚ and safely cooked ham for your enjoyment․
Using a Meat Thermometer for Accuracy
Achieving perfectly cooked Appleton Farms boneless ham relies heavily on using a meat thermometer․ Don’t solely depend on cooking time estimations! Insert the thermometer into the thickest part of the ham‚ avoiding the bone if present (though this is boneless‚ ensure it’s not near any bone fragments)․ For pre-cooked hams‚ aim for an internal temperature of 140°F (60°C)․ This ensures it’s heated through without drying out․
If you’re cooking a fully uncooked ham‚ the target temperature is 160°F (71°C)․ Check the temperature in multiple spots to guarantee even heating․ Begin checking the temperature about 30 minutes before the estimated cooking time is up․ A reliable meat thermometer is your best defense against undercooked or overcooked ham‚ guaranteeing a safe and delicious result for your meal․
Glaze Application During Cooking
Applying glaze during the final stages of cooking creates a beautiful‚ flavorful crust․ Frequent basting prevents burning and ensures even coverage for a delicious finish․
When to Apply the Glaze
The timing of glaze application is crucial for achieving that perfect‚ glistening finish on your Appleton Farms boneless ham․ Generally‚ you should wait until the last 30-45 minutes of the cooking process to begin glazing․ Applying the glaze too early can lead to excessive burning and a sticky‚ potentially bitter‚ coating․
This timeframe allows the sugars in the glaze to caramelize beautifully without completely charring․ For the first application‚ brush a generous layer over the entire surface of the ham․ Remember‚ a pre-cooked ham primarily needs reheating‚ so the glaze is focused on flavor and appearance rather than penetrating deeply into the meat․
Consider the glaze’s sugar content; higher sugar glazes burn faster‚ requiring closer monitoring and potentially later application within that 30-45 minute window․ Patience is key to a stunning glazed ham!
Frequency of Glaze Application
For a beautifully glazed Appleton Farms boneless ham‚ multiple glaze applications are recommended‚ rather than a single heavy coat․ After the initial glaze application during the last 30-45 minutes of cooking‚ repeat the process every 15-20 minutes․ This layering technique builds up a rich‚ flavorful‚ and visually appealing crust․
Each subsequent application should be a slightly thinner layer‚ ensuring the glaze doesn’t become overly thick or burn․ Consistent basting with pan juices between glaze applications can also contribute to a moist and flavorful ham․
Pay close attention to the ham’s surface; if it’s already deeply colored‚ reduce the frequency of glazing to prevent burning․ The goal is a vibrant‚ even glaze that complements the ham’s savory flavor‚ not a blackened‚ overly sweet exterior․
Preventing Glaze from Burning
A common concern when glazing an Appleton Farms boneless ham is preventing the sugar content from burning․ To mitigate this‚ lower the oven temperature slightly during the final glazing stages – perhaps by 25 degrees Fahrenheit․ Consistent monitoring is crucial; check the ham frequently‚ especially during the last 30 minutes․
If the glaze begins to darken too quickly‚ tent the ham loosely with aluminum foil․ This shields it from direct heat while still allowing it to cook through․ Basting the ham with pan juices between glaze applications also helps regulate the surface temperature and adds moisture․
Avoid glazes with a very high sugar concentration‚ and consider adding a touch of acidity‚ like Dijon mustard or citrus juice‚ to balance the sweetness․ Remember‚ a beautiful glaze is golden brown‚ not charred!
Serving & Leftovers
Properly rested and carved‚ Appleton Farms ham offers delicious meals․ Store leftovers promptly and reheat carefully to maintain flavor and ensure food safety for enjoyment․
Resting the Ham Before Carving
Allowing your Appleton Farms boneless ham to rest after cooking is a crucial‚ often overlooked‚ step․ This resting period‚ typically 15-20 minutes‚ allows the juices within the ham to redistribute throughout the meat․ During cooking‚ these juices are forced towards the center; resting allows them to flow back into the muscle fibers‚ resulting in a significantly more moist and flavorful final product․
Think of it like letting a steak rest – the principle is the same! If you carve the ham immediately‚ all those flavorful juices will simply run out onto the cutting board‚ leaving you with drier slices․ Tent the ham loosely with aluminum foil during the resting period to help retain some heat‚ but avoid wrapping it tightly‚ as this can steam the ham and affect the texture of the glaze‚ if applied․ Patience is key for a truly exceptional ham experience!
Carving a Boneless Ham – Techniques
Since you’re working with a boneless ham‚ carving is relatively straightforward․ Begin by placing the ham on a large carving board with the flat side down for stability․ Using a long‚ sharp carving knife‚ start by slicing against the grain of the meat․ This shortens the muscle fibers‚ making each slice more tender․
Aim for slices approximately ¼ to ½ inch thick – adjust to your preference․ For consistent slices‚ move the knife in a smooth‚ even motion․ If the ham is particularly large‚ you can start by carving off a few larger “roasts” and then slicing those individually․ Remember to maintain a consistent angle with your knife for uniform presentation․ Don’t be afraid to take your time and enjoy the process; a beautifully carved ham adds to the overall dining experience!
Storing Leftover Appleton Farms Ham
Proper storage is crucial for maintaining the quality and safety of your leftover Appleton Farms boneless ham․ Within two hours of cooking‚ remove the ham from the bone (if any remains) and store it in an airtight container or tightly wrapped in plastic wrap․ Refrigerate promptly; leftover ham should be kept at 40°F (4°C) or below․
When stored correctly‚ cooked ham will generally remain safe to eat for 3-5 days in the refrigerator․ For longer storage‚ consider freezing․ Wrap the ham tightly in freezer-safe plastic wrap‚ then place it in a freezer bag‚ removing as much air as possible․ Frozen ham can maintain good quality for up to 1-2 months‚ though it may lose some moisture over time․
Reheating Leftover Ham
Reheating leftover Appleton Farms boneless ham requires a gentle approach to prevent it from drying out․ The microwave is quickest – use low power and short intervals (30-60 seconds) with a little moisture (broth or water) added to the container‚ covering it loosely․ Check the internal temperature reaches 140°F (60°C)․
For larger portions‚ oven reheating is preferred․ Preheat your oven to 325°F (160°C)․ Place the ham in a baking dish with a splash of liquid‚ cover with foil‚ and heat for approximately 10-15 minutes per pound‚ or until warmed through․ A meat thermometer is essential to ensure it reaches a safe internal temperature․ Avoid prolonged high-heat reheating‚ as this will result in a dry‚ less flavorful ham․
Troubleshooting Common Issues
Addressing dryness‚ burning glaze‚ or incomplete heating ensures a perfect ham․ Utilize a meat thermometer‚ adjust oven temperature‚ and add moisture as needed for success․
Ham is Too Dry
A dry ham is a common concern‚ especially with boneless varieties which lack the bone’s insulating properties․ Several factors contribute to this issue‚ and thankfully‚ solutions exist! First‚ ensure you aren’t overcooking the ham; relying on a meat thermometer is crucial for accuracy․ Pre-cooked hams primarily need reheating‚ not extensive cooking․
Secondly‚ consider adding moisture during the cooking process․ Placing the ham in a roasting pan with a cup of water or broth creates steam‚ helping retain moisture․ Covering the ham loosely with foil for a portion of the cooking time also prevents excessive drying․
Finally‚ the glaze itself can contribute to dryness if it contains a high sugar content and burns․ Applying glaze later in the cooking process‚ and basting frequently‚ can mitigate this․ If the ham is already dry‚ serving it with a flavorful sauce can help restore moisture and enhance the overall taste․
Glaze is Burning
A burnt glaze is a frequent issue when cooking an Appleton Farms boneless ham‚ often due to the high sugar content in many glaze recipes․ To prevent this‚ timing is key! Avoid applying the glaze too early in the cooking process․ Ideally‚ glaze should be applied during the last 30-45 minutes of baking;
Frequent basting is also crucial; Every 15-20 minutes‚ brush the ham with the glaze to create a consistent‚ even coating and prevent localized burning․ If you notice the glaze is browning too quickly‚ tent the ham loosely with aluminum foil to deflect some of the heat․
Lowering the oven temperature slightly during the glazing phase can also help․ Monitor the ham closely‚ and if burning occurs‚ immediately cover it tightly with foil․ Remember‚ a slightly under-glazed ham is preferable to a burnt one – you can always add another layer!
Ham is Not Heated Through
If your Appleton Farms boneless ham isn’t reaching a safe internal temperature‚ it’s crucial to address the issue immediately․ Remember‚ pre-cooked hams require reheating‚ not full cooking‚ but they must reach 140°F (60°C) to be safe for consumption․
The most common cause is insufficient cooking time․ Double-check your calculations based on the ham’s weight and whether it’s bone-in or boneless․ Ensure your oven is accurately calibrated; an inaccurate oven can significantly impact cooking times․
Use a reliable meat thermometer inserted into the thickest part of the ham‚ avoiding the bone if present․ If the temperature is low‚ continue baking‚ checking every 15-20 minutes․ Avoid opening the oven door frequently‚ as this releases heat․ If the exterior is browning too quickly‚ tent with foil while continuing to heat․
Internal Temperature Concerns
Maintaining proper internal temperature is paramount when cooking an Appleton Farms boneless ham․ A meat thermometer is your most reliable tool‚ ensuring food safety and optimal flavor․ Pre-cooked hams‚ as commonly found‚ need only to reach 140°F (60°C) for safe consumption‚ while uncooked hams require a higher temperature of 165°F (74°C)․
Always insert the thermometer into the thickest part of the ham‚ avoiding contact with bone‚ fat‚ or the pan․ Multiple readings in different locations can provide a more accurate assessment․ If the temperature isn’t consistent throughout‚ continue cooking․
Remember that carryover cooking will raise the temperature slightly after removing the ham from the oven․ Allow it to rest for the recommended time before carving to ensure even heat distribution and a juicy result․ Prioritize temperature over time; a thermometer guarantees a safe and delicious ham․

Leave a Reply
You must be logged in to post a comment.